How do I make a party feel themed without buying everything?
Quick answer: Choose one main activity that fits the theme and put it where guests can see it. Then repeat the idea or two colors in a few places guests already use, such as a welcome sign, the food table and one photo spot. Use plates, trays, bedding and table coverings you already own. You do not need matching decorations for every room, wall or supply.
Start with the activity, then repeat the idea in a few places
A party feels themed when guests can tell what it is about as soon as they arrive. That usually comes from what they do, not from how many matching items are in the room. Paper crowns at a princess party, a dig tray at a dinosaur party or a robot-building table at a robot party all tell guests the theme before anyone looks at the plates.
Choose the main activity first, together with your child if it is their party. Then add the theme to a small number of places guests will actually use: a welcome sign at the door, a sign or labels at the food table and one spot for photos. Those three places are enough to carry most themes. Several Party Whammy guides suggest the same pattern of one activity, one food-label idea and one photo setup.
Buy the activity supplies and food before you buy decorations. Once those are settled, look at what is left in your budget and your space, and decide whether any extra decoration would add something you or your child actually want. Many hosts find they can stop there.
- Pick one main activity guests can see and join.
- Add a welcome sign or a table sign with the theme name.
- Repeat one or two colors on supplies you need anyway.
- Choose one photo spot, or let a prop from the activity be the photo detail.
- Check what you already own before shopping for anything else.
How do I use color without buying everything to match?
Repeating one or two colors is the simplest way to connect different parts of the party. Put them on things you need anyway: napkins, cups, paper signs, food labels and name cards. A camping party might use two colors on the camp sign and food labels; a sports party might use team colors on cups and napkins.
Your existing plates, serving dishes, trays, bedding and cushions can stay as they are. Plain white plates or a table covering you already have will not spoil the theme. Two or three shades of the same color can sit together without looking mismatched.
If the theme is a color, the same approach applies. Repeat the color at the activity table, on a food-table sign and in one backdrop or poster. For a black-and-white party, one visible detail such as a checkerboard runner or a white drawing table with black markers can do much of the work.
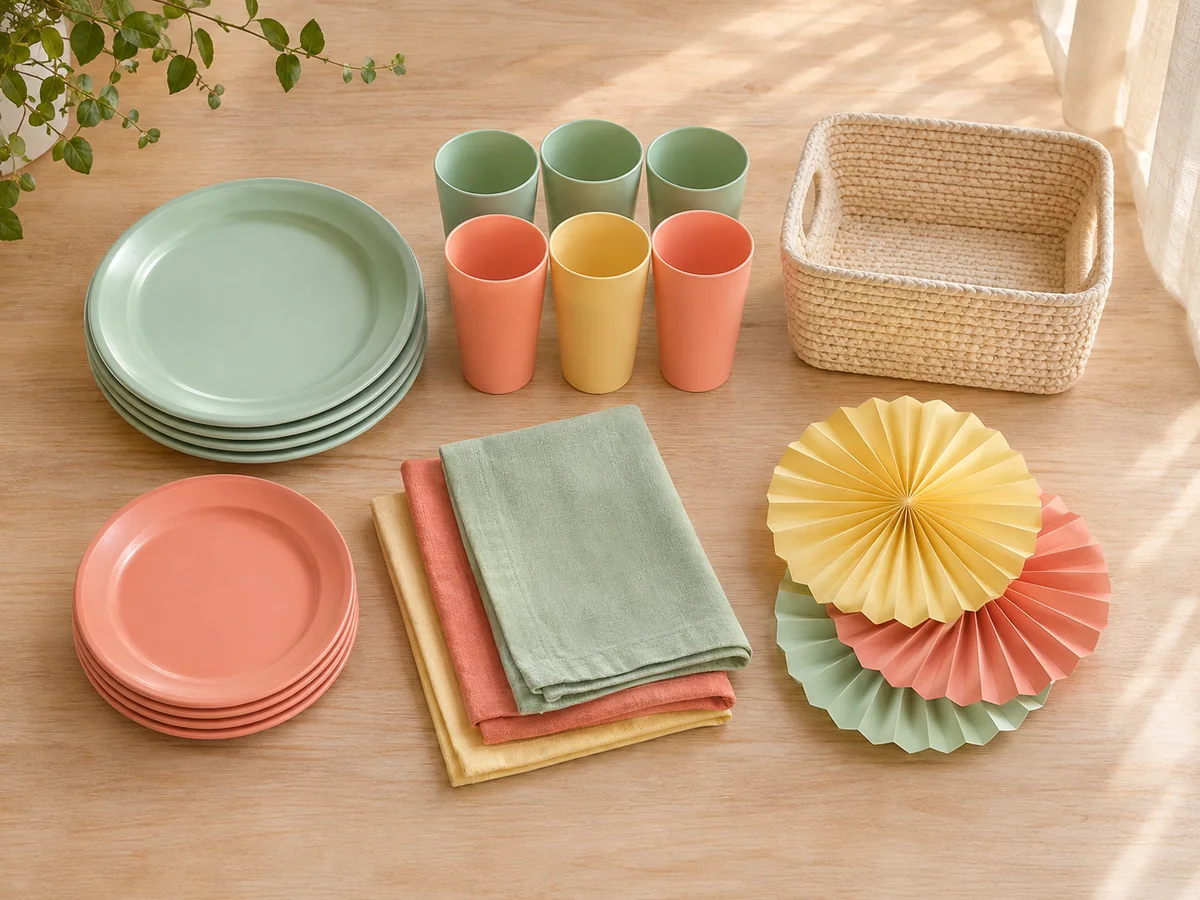
How can I decorate without buying everything in pink or another single color?
Quick answer: Repeat the color in a few visible places, such as the activity supplies, a table sign and the photo backdrop, and use plates and serving dishes you already own.
Every item does not need to match. Two or three shades of pink, green or silver can work together. For a green party, a leaf collage and a few matching paper goods give you specific places to use the color. For a silver party, start with one silver display, such as a paper-star table, a foil-fringe photo corner or silver trays beside a birthday sign, then repeat silver in small details like label borders or napkins.
Check what you already have in that color before you shop. A scarf, a tablecloth or a few trays may be enough for one display.
Decorate one area instead of the whole room
You do not need to cover every wall or table. Pick one place guests will notice and use, such as the cake table, the entrance, the activity table or a photo corner, and make that your main display. A banner behind the cake or a plain wall with one backdrop may be all you need.
Arrange the activity, seating and serving space before you add decorations. Leave room on tables for plates, drinks and activity materials. In a small home, guests need table and floor space first; the activity and the finished projects can help make the room feel ready. If you are using string lights or a larger backdrop, try the setup with people in the space before adding more.
For an outdoor party, the same rule applies: decorate the cake table or entrance and repeat a color or a birthday message in a few places, rather than decorating the whole yard.
How do I decorate a party on a small budget?
Quick answer: Choose one area, check what you can reuse or borrow, then list only the missing materials and compare the complete cost before shopping.
A sheet or plain wall as a backdrop, paper decorations and serving dishes you already own are possible starting points. Write down where each new item will go before you buy it, so you do not end up with decorations that have no place.
When you add up costs, include supports and attachments such as tape, string or hooks, not just the decoration itself. If you add balloons or streamers, list their supplies separately so you can compare the full cost of each option. Use your own prices; there is no standard budget that fits every party.
How can we decorate a teen party without buying too much?
Quick answer: Ask your teen which detail matters most, then start with one photo corner or the food table and repeat a color or display style in a few places.
A borrowed lamp, a plain wall or fabric backdrop and one paper or balloon accent can make a photo corner without much spending. Write down the full cost of anything you need to buy before adding more. Letting your teen choose the detail means the money goes on the part they care about.
What does this look like for different themes?
The pattern stays the same across themes: an activity, a sign and one table or photo detail. The examples below come from Party Whammy theme guides. They are suggestions, not shopping lists; use the parts your child likes and the supplies you already have.
Many activities do double duty. A decorated shield, paper crown, program or paper bouquet can be the activity, the photo prop and the take-home item all at once.
| Theme | Main activity | Sign or table detail | Photo or extra detail (optional) |
|---|---|---|---|
| Astronaut | Making paper rockets | Mission-control sign | Helmet photo prop |
| Baseball | Paper pennant project or baseball activity | Concession sign, team colors | Scoreboard backdrop |
| Castle or knight | Paper crowns, decorated shields or a clue quest | Feast labels on familiar food | Cardboard gate or castle picture |
| Dinosaur | Dig tray with expedition cards | Handwritten dig-site sign, dinosaur food names with the real food listed | Paper dinosaur prop |
| Detective or mystery | Case cards or folder, clue envelopes, paper badges | Detective name or numbered labels at the food table | Case closed photo sign |
| Robot | Robot-building table | Robot Workshop sign | Paper robot face |
| Bee | Antennae or paper honeycomb | Yellow-and-black table details | Paper-honeycomb display |
| Carnival or arcade | One game booth or game with tickets | Welcome sign, small prize counter | Paper ticket or controller prop |
| Treasure hunt | Clue envelopes, hand-drawn map, treasure box | Map or X on the food-table sign | Map backdrop |
| Kitten or pet adoption | Kitten ears or a pretend adoption center with certificates | Adoption sign, cat-themed food label | Stuffed pets in baskets |
| Outdoor movie | The screen and homemade tickets | Snack-table sign | One photo prop |
How can I make the party feel like a craft party without buying lots of decorations?
Quick answer: Put the sample project and supplies where guests can see them, repeat two colors on the table sign and plates, and use the finished projects as the display.
At a craft party the supplies are the decoration. A visible sample shows guests what they are making and sets the theme at the same time. Make the sample beforehand so you know which steps need help.
As guests finish, put their work in one place. That display grows during the party and replaces decorations you might otherwise buy. Extra decorations are optional.
How do I make the party feel like a paint party without buying lots of decorations?
Quick answer: Let the painting table carry the theme, add a welcome sign, repeat two colors in a few table items and display the finished artwork when it is ready.
Paint takes time to dry, so plan a spot for finished pieces to sit before you display them. An art party works the same way: the activity table shows the theme, and a simple photo spot or food label can add one more detail if you want it. You do not need to decorate every room.
How can I make the room feel like a dance party without buying lots of decorations?
Quick answer: Start with music and a game, then repeat two colors on a welcome sign, snack plates and a photo backdrop.
Colored lighting is optional; you can run all the activities with ordinary room lighting. For a glow-style party, freeze dancing, neon snack labels and a two-color streamer wall give you three specific things to prepare. For a rock star party, a music activity, one backdrop and backstage labels beside familiar food are enough.
How can I make it feel like a camping party without buying lots of decorations?
Quick answer: Start with a camp sign, a pretend campfire and one camping activity, and repeat two colors in the sign and food labels.
Use plates and table coverings you already have. For an indoor campout or tent sleepover, existing blankets and pillows can stay as they are; a paper campsite sign and a shared activity may be all you want to add. Add other decorations only if you want them and have room. Keep decorations off the route to the bathroom and the bag area.
How can I make the butterfly theme clear without buying a matching party set?
Quick answer: Start with paper butterflies at the activity table and repeat two colors in a sign, napkins or food labels.
Use plain plates and a table covering you already have. Add a backdrop only if you want a separate place for pictures. The same approach suits nearby themes: a ladybug party can use spotted headbands or wing pictures with red and black at the table, and a fairy party can use a fairy craft or door trail with one decorated table or photo spot.
How can I make the ballet theme clear without buying lots of decorations?
Quick answer: Start with a music activity, a welcome sign and a small reception table, and repeat two colors on paper goods or programs if you like.
A decorated program or paper bouquet can be the photo prop and the take-home item, so you do not need separate favors. The reception table gives the party a clear focus without decorating the whole room.
Connect the food to the theme with labels
Food can stay familiar. A table sign or a few labels is enough to connect it to the theme: feast labels at a knight party, backstage labels at a rock star party, spell-book sandwiches at a wizard party, or a rainbow food detail at a unicorn party.
Write the real food name below any playful title, such as Popcorn written under Moon rocks. Use separate labels when toppings differ, and keep ingredient information from the packaging available to the host. A theme label does not tell families what they need to know about the food, so confirm food questions with them directly.
How can I make it feel like a pizza party without buying lots of decorations?
Quick answer: Use the pizza table as the main setup, add a pizza-shop welcome sign and offer a paper slice or menu craft.
Repeat two colors in the signs and paper goods if you like. Similar food-led themes work the same way. At a pancake party, the pancake decorating table carries the theme with a breakfast sign. At a taco party, children can make paper tacos for a banner or draw restaurant pictures. At an ice cream or donut party, paper cones, a paper donut sign or a sprinkle-style backdrop is enough.
Keep serving space clear before adding decorations. Skip anything that adds work without helping guests find the food, join an activity or enjoy the party.
Small sleepovers, mixed themes and grown-up gatherings
The smaller the group, the more one shared activity can carry the whole party. The same approach also helps when your child wants two themes, or when the guests are adults who do not need a theme at all.
How can I make a small sleepover feel special without buying lots of decorations?
Quick answer: Let the activity provide the detail, such as homemade movie tickets, decorated bookmarks or a shared comic.
With only a few friends, keep everyone around one shared project. If your child wants a theme, repeat one color or idea in a few places rather than buying a matching set of everything. Use bedding, trays and cushions you already own; they do not need to match the party.
For a birthday, a favorite color on the table and birthday sign, a shared poster guests sign, or finished crafts as take-home gifts can make the evening feel special without extra shopping.
Can we combine two themes without buying two sets of decorations?
Quick answer: Choose one shared color pair and include a different interest in each activity.
A movie-and-craft night can use the same welcome sign, food labels and backdrop, with tickets to decorate before the movie. You do not need a second set of plates, banners and favors.
How can I make an adult party feel special without buying more?
Quick answer: Serve a favorite meal, play songs the group enjoys or leave a poster for birthday messages.
Use supplies you already have and add only the details that matter to the gathering. Friends do not need matching decorations, costumes or favors to spend time together.
Worked example: a jungle party in one room
This is an illustrative example, not a required kit. It shows how the pieces fit together for a jungle theme using mostly things a household may already have. Swap in your own theme using the table above.
Activity: an animal activity, such as children drawing or making paper animals at one table. Table detail: paper leaves along one table or on a backdrop. Food: a familiar snack with a jungle label and the real food name underneath. Colors: two colors repeated on plates and signs you need anyway.
Setup order: first arrange the activity table and seating, and check there is room to serve food. Then put up the welcome sign and the leaf display. Add food labels last, when you know where each dish will sit. Take photos early while the table is still clear. If you still have time, budget and space after that, decide whether anything else is worth adding.
- Activity chosen and supplies bought or borrowed
- Seats and table space checked for the number of guests
- Two colors picked from supplies you need anyway
- Welcome sign made
- One display area chosen: activity table, food table or photo corner
- Food labels written with the real food name
- Photo spot or prop ready, or the activity prop used for photos
- Place for finished projects and named take-home bags
What can I leave out?
Skip decorations that add setup or cleanup but do not help guests know what to do, find the food or enjoy the party. A finished craft can replace a separate favor bag, and one decorated activity table can replace several smaller displays.
Backdrops, balloons, colored lighting, costumes and favor bags are all optional. Add one only if your child wants it, you have room and it fits the budget left after food and activity supplies. A shared drawing, a homemade prop or the cake can provide the photo detail if you do not want a separate backdrop.
A useful next step: write down your main activity, two colors and the one area you will decorate, then check what you already own for each before making a shopping list.