How do I decorate a small party space without clutter or damage?
Quick answer: First decide where guests will sit, eat, leave their things and do the main activity. Then choose one main display, such as a banner behind the cake or a small tabletop display, and repeat one of its colors or shapes on a few signs. Check what you're allowed to attach before you put anything up. If you can't use the walls, decorate tables you're allowed to use. Avoiding glitter and loose confetti cuts down on scattered pieces, but nothing guarantees that a decoration or adhesive won't leave a mark.
Decide where guests will sit, eat and play before you decorate
In a small room, decorations compete with people for space. Before you buy anything, decide where guests will put coats, bags and gifts, where they will eat and where the main activity will happen. Once those places are settled, choose one wall or table for the main decoration. It's easier to pick a banner or tabletop display of the right size when you know what space is left.
Look at the furniture you'll actually keep in the room, not an empty floor plan. When you count people, include the birthday child and any adults or siblings who are staying, as well as the invited children. Count each person once.
In a rented room or another venue, check what you may attach to walls, doors, tables or fixtures, and when the room has to be cleared. Rules depend on the venue, so ask rather than assume.
What should I decide first for small space party decorations?
Quick answer: Decide where guests will sit, eat, leave their belongings and do the main activity. Then choose a wall or table for the main display and find out what you're allowed to attach there.
Settle the guest count, the food table and the activity space before you choose the size of the decoration. When you check whether the room is big enough, count any adults who are staying as well as the children.
Choose one main display and repeat its colors
You don't need a display on every wall. Start with one, such as a birthday banner behind the cake table or a small streamer backdrop for photos. One banner can be both the birthday decoration and the photo backdrop. To decorate more, repeat its color or a paper shape on napkins, a few signs or place cards instead of buying a matching set of everything.
Prepare the main display completely before you start on extras. Leave out glitter, loose confetti and anything that sheds small pieces, and draw shapes on paper or card instead. Do all the cutting and assembly before party day, and don't use wet glue or materials that could stain carpet in the party area. Pack each finished piece with its fasteners and either a photo or written instructions, so another adult can put it up from your notes. Pick the display you most want, check where it will go and make a sample before preparing the rest. For a name banner, write one letter of the birthday child's name on each flag and draw stars or stripes rather than adding loose decorations. Lay the letters out in order before attaching them to the string, then check that you can read the name from across the room. For table signs, fold card in half so it stands up, write the word on the front with a small drawing beside it, and put each sign out with the actual supplies to check that it doesn't block them. For a streamer backdrop, measure and cut the strips before the party and keep the offcuts out of the setup box. For a framed message, write the message or draw a picture on paper that fits the frame, then put it in the frame.
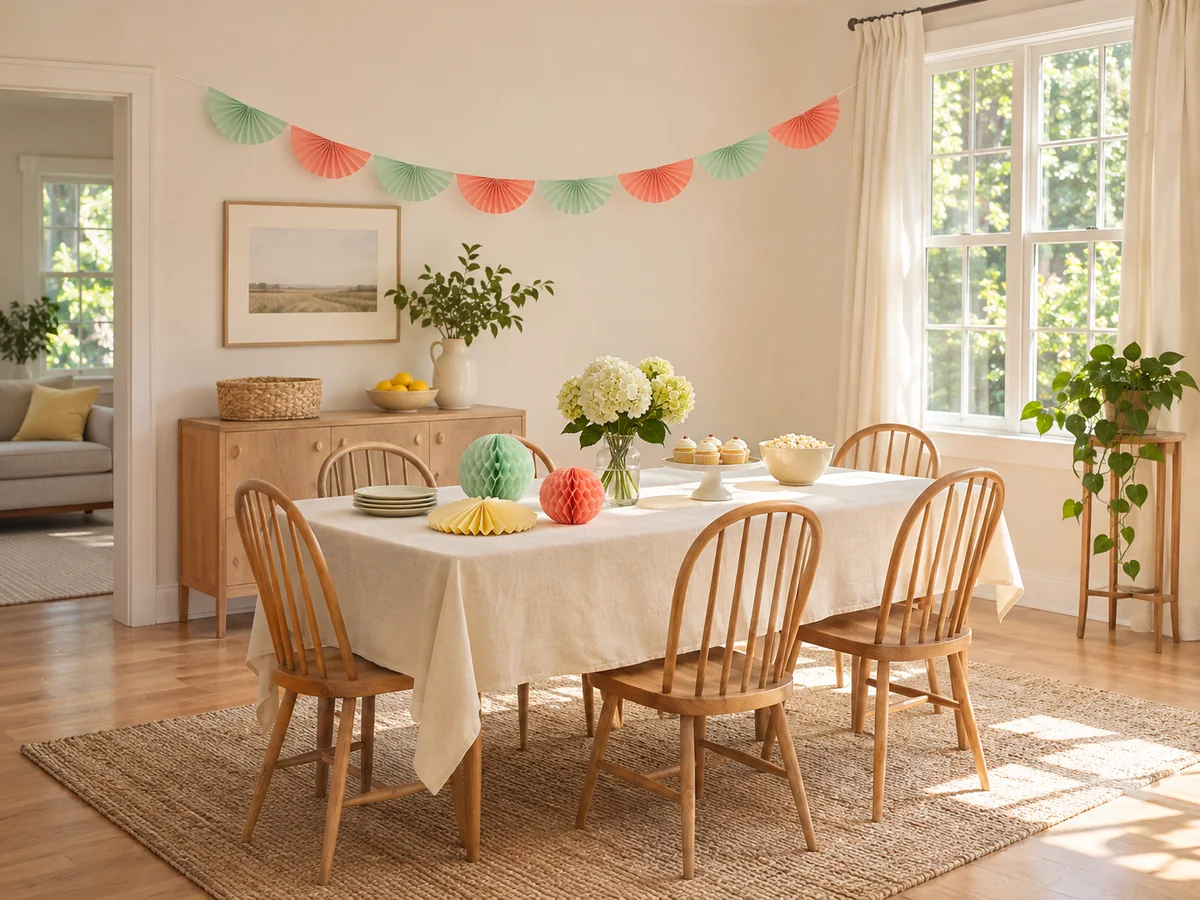
| Display | Supplies | Where it fits best | How to pack it afterward |
|---|---|---|---|
| Paper name banner | Paper or card, pencil, scissors, markers, string, a fastening method allowed at that spot | Behind the cake table, where people can read it from across the room | Take it down in one piece and store it flat with its fasteners |
| Folded table signs | Card, pencil, markers, scissors if needed | Beside the drinks, crafts or take-home bags, without blocking them | Put them in an envelope when you clear the tables |
| Small streamer backdrop | Streamers, scissors, measuring tape, permitted fasteners | A few strips at each end of a banner, not a whole wall | Collect the strips straight into a bag or box |
| Framed birthday message | A frame you already own, paper or card that fits it, markers | Beside the cake or on a small welcome table | Pack the frame separately; you can keep the message |
How do I make the party feel intentional without overbuying?
Quick answer: Repeat one color or paper shape on a banner, a table sign and a poster, and check what you already own before you shop.
Before shopping, choose the main display and list the supplies it needs. Then count only the things guests will actually use, such as cups and place cards. Leave out decorations that compete with plates, supplies or guest space.
You don't need matching plates and decorations. Use the supplies you have, and repeat a color or shape on a sign and place cards if you want the table to look coordinated.
How do I keep preparation manageable?
Quick answer: Finish one main display before starting any extras, and keep the setup simple enough that a helper can follow your notes.
Add only the signs and small details you'll actually use. Repeat the main display's color or drawing on a few signs instead of matching every supply.
How much of the room should I decorate?
Quick answer: Start with one display, such as a birthday banner behind the cake table or a small streamer backdrop for photos. You don't need a display on every wall.
If you want more decoration, repeat that display's colors on napkins or a few signs. One banner can be both the birthday decoration and the photo backdrop, which leaves more of the room free for guests.
Do I need matching plates and decorations?
Quick answer: No. Use the supplies you have, and repeat a color or paper shape on a sign and place cards if you want the table to look coordinated.
Set out plates, cups and activity supplies first, then fit the sign and place cards around them, so the decorations don't take up room needed for food and the activity.
Decorate without attaching anything to the walls
If attachments aren't allowed, or you'd rather not risk the paint, decorate surfaces instead. Use folded card signs that say things like Drinks, Crafts or Take-home bags, with a small cup, pencil or bag drawn next to the words. A framed paper message or a birthday poster propped where it will stay in place also works. If you use colors to mark different areas, keep the words or pictures too, so guests don't have to rely on color alone.
A tabletop display still needs a suitable spot. Use only surfaces you're allowed to use, and leave room for food and activities. If you want a separate backdrop, check whether the room allows a freestanding display and whether there's space for it.
How can I decorate without attaching anything to the walls?
Quick answer: Use a table cover, folded table signs, a framed paper message or a propped-up birthday poster on surfaces you're allowed to use.
Check the venue's rules rather than assuming every table or shelf is free to use. Don't assume an adhesive is suitable for a surface, even one sold as removable.
Can I guarantee that the decorations will leave no marks?
Quick answer: No. Surfaces, fastening products and venue rules all differ.
Check that you have permission and read the product instructions before attaching anything. Skipping glitter and loose confetti means fewer scattered pieces to clean up, but it doesn't mean an adhesive or decoration can't leave a mark.
Set up the table so guests have room to eat and play
Put trays, plates, cups and food labels out first, then fit decorations around them. Keep craft materials and take-home bags away from the food. At each child's seat, put only what they need for the first activity. For drawing, a sheet of paper and a small cup of drawing supplies may be enough. If space is tight, keep the plates aside until they're needed. Set one full place first and check it before setting the rest.
If seats are cramped, move serving trays, spare supplies and take-home bags off the eating table first. If it's still too tight, use another suitable table or think again about how many guests will sit at once. Check with the actual chairs and activity materials rather than going by how many seats the table is sold for.
A runner decorates only part of a table. You can use one without a tablecloth if you want the tabletop to show; use a separate cover if you want more of the table covered. Check the table and the cover's instructions before putting serving dishes on them.
For centerpieces, set up one sample with the place settings first. A short table may need only one small display; a long table could take several low pieces with gaps between them. To check the height, have someone sit on each side, and look from the children's seats too. If the decoration hides anyone's face, make it shorter or move it. No one height suits every table. Instead of flowers, you could use a folded paper sign, a tray of favor bags with guests' names on them, or a snack display that suits your guests. At a craft table, a cup of markers next to a small birthday sign may be all you need. Food can be the centerpiece if it suits your guests and leaves room to serve. Keep labels visible, have serving tools ready, decide how you'll refill it and expect it to look different as people eat.
Does a table runner have to hang over the ends?
Quick answer: No. It can hang over both ends, stop at the edges or leave a strip of table showing at each end.
Measure the table and try the layout with the chairs and dishes in place before you buy or cut a runner.
What can I use instead of buying a table runner?
Quick answer: Try a folded tablecloth, a suitable length of fabric, kraft paper or a row of placemats.
Lay out what you already have and check that it fits around the dishes. Paper and fabric still need to suit what the table will be used for.
How do I match the runner to the rest of the decorations?
Quick answer: Pick up one color from the backdrop, balloons, napkins or welcome sign. Not everything needs to match.
If your dishes and tableware already have patterns, try a plain runner so the table doesn't look crowded with designs.
Can I use a runner without a tablecloth?
Quick answer: Yes, if you want the tabletop to show.
A runner covers only part of the table, so use a separate cover if you want more of it covered. Check the table and the cover's instructions before putting serving dishes on them.
How many centerpieces do I need?
Quick answer: Set up one sample with the place settings first, then decide. A short table may need only one small display; a long table could take several low pieces with gaps between them.
Buy supplies after you've checked how many fit around the plates and dishes.
How tall should a party centerpiece be?
Quick answer: Low enough that people can see each other across the table. No one height suits every table.
Have someone sit on each side and look from the children's seats too. If the decoration hides anyone's face, make it shorter or move it.
What can I use instead of flowers?
Quick answer: Try a folded paper sign, a tray of favor bags with guests' names on them or a snack display that suits your guests.
At a craft table, a cup of markers next to a small birthday sign may be all you need.
Can the centerpiece be part of the food?
Quick answer: Yes, if the food suits your guests and the arrangement leaves room to serve it.
Keep labels visible, have the serving tools ready and decide how you'll refill it. Expect it to look different as people eat.
What should go at each child's seat?
Quick answer: Only what they need for the first activity. For drawing, a sheet of paper and a small cup of drawing supplies may be enough.
If space is tight, keep plates and other items aside until they're needed. Set one full place first and check it before setting the rest.
What if there isn't enough room for everyone?
Quick answer: Move serving trays, spare supplies and take-home bags off the eating table first.
If seats are still cramped, use another suitable table or think again about how many guests will sit at once. Check with the actual chairs and activity materials rather than going by how many seats the table is sold for.
Use one table for crafts, games and food
In a small space, one table often has to do more than one job. Choose decorations you can move easily, and decide before guests arrive where each piece will go when the table is cleared.
What if I need the table for crafts or games?
Quick answer: Put the centerpiece on a tray you can carry, decide where it will go next before guests arrive, and move it before setting out the activity supplies.
If the table is already crowded, put a small sign nearby instead of a centerpiece.
Crafts and food can share a table if you leave time to put projects aside, gather the supplies and clean the surface, or change the table cover, before serving. Keep plates and napkins somewhere nearby, away from the craft, so they're ready when you switch over. Set up a separate place for finished projects, especially ones that need to dry.
Can crafts and food use the same table?
Quick answer: Yes, if you leave time and space to clear it between uses.
Before serving, put projects aside, gather the craft supplies and clean the table or change its cover. Keep plates and napkins ready nearby, away from the craft, and set up another surface for finished projects, especially ones that need to dry.
Example: decorating a small living room
This example is for illustration only. Imagine a living-room party for eight children, including the birthday child, with three adults staying, including the host. That's 11 people to fit in the room, each counted once. Coats and bags go on a bed in another room. One table is used for drawing first, then food.
The main display is a paper name banner with drawn stars, hung on a wall where the host is allowed to attach it. If you can't attach it, a framed birthday message beside the cake does the same job. A folded Drinks sign has the same star on it. The table has a plain runner made from kraft paper, with a small cup of markers next to a birthday sign as the centerpiece. That centerpiece sits on a tray that moves to a shelf before food is served. Finished drawings go on a side surface.
The setup below assumes the decorations are already made, attachment permission is settled and the room is free to use. Give yourself more time, or use a simpler display, if your space needs it.
- The five steps add up to 30 minutes.
- Keep a helper free to greet guests as they arrive, rather than finishing displays when the doorbell rings.
| Illustrative time | Task |
|---|---|
| 0:00–0:05 | Check the room: confirm where the entry, table and photo spot are with the furniture in place. |
| 0:05–0:15 | Put up the banner using the agreed attachment method and your setup photo. |
| 0:15–0:20 | Put out the table signs and framed message, leaving room for food, labels and serving utensils. |
| 0:20–0:25 | Put away setup supplies: pack spare pieces, scissors and unused fasteners, and pick up any offcuts. |
| 0:25–0:30 | Walk the route guests will take, check the signs and show a helper where the cleanup supplies are. |
Have a backup if plans change
Keep a smaller display that you can move in a few pieces, such as signs and a framed message. If guests need a change of pace, have paper and markers or a short seated game ready in the space you've already set up. A snack break, a quiet table, a different playlist or a photo prompt also gives you time to adjust the next activity.
If you planned to use a balcony or yard, decide in advance where that activity will go if the weather changes. Outdoors, secure lightweight decorations and keep paths clear. If there's no indoor room big enough for the party, decide on a weather plan separately. Decorations alone won't solve that.
What is the easiest backup plan?
Quick answer: Keep a smaller display you can move in a few pieces, and have paper and markers or a short seated game ready in the room you've already set up.
A snack break, a quiet table, a different playlist or a photo prompt can also give you time to adjust. If you planned to use a balcony or yard, decide where that activity will go if the weather changes, and make a separate weather plan if no indoor room fits the party.
Check the room before guests arrive
- Confirm which attachment methods are allowed and when the room must be cleared.
- Finish cutting and assembly, and remove loose offcuts from your supplies.
- Pack each display with its fasteners, setup photo and the name of the helper putting it up.
- Leave space for coats, bags, gifts, activities and people moving around.
- Put out food labels and any separate trays before adding table decorations.
- Check that signs use words or pictures alongside any color coding, and that you can read them in the party lighting.
- Decide what you'll move if the table is needed for food or an activity.
- Keep bags or boxes for decorations, plus trash bags, wipes and towels, near the party area.
- At the end, leave time for take-home bags, finished projects, leftovers and pickup, then check the room before you leave.
Find out when the venue needs the room cleared and what it expects before you leave. Then decide who packs decorations, who returns borrowed items to their owners and who does the last walk-through. The Party Cleanup Checklist covers belongings and room checks so nothing is left behind.