How do I organize a craft station for a children’s party?
Quick answer: Pick one main project and test a full sample first, including fastening, drying and packing. Give each guest a base item and a workspace with their name on it. Put shared supplies within reach, and have extra copies of any tool everyone needs at the same step. Before guests arrive, set aside a labeled drying area, a quiet option for early finishers and a separate place for food. Stay nearby to help with tricky steps, let children choose their own designs, and leave the last part of the party for packing projects and telling families about any remaining drying or finishing steps.
Choose one main project and test it first
Start with a project the birthday child wants to try and that fits your space, supplies and time. For a teen party, show them two or three options and let them help choose the project, designs and music. For younger children, choose something with a simple part they can do themselves.
For a teen party, a list of teen craft projects to make with friends can help you build the shortlist of two or three options. Ask your teen to pick the main project and a few design options, then test the materials and check finishing time before the party.
Make a full sample before the party. Go through every step, including fastening, drying and packing, not just the fun decorating part. A tote bag can look finished while its paint still needs time before anyone handles it. With a bracelet, the knot may take more help than choosing the beads. Check the instructions for the exact materials you plan to buy instead of assuming everything will be ready at pickup.
One main project with a few design choices is usually enough. Guests can make different patterns from the same supplies, so you don't need several separate stations. Keep a quiet option available, such as drawing, stickers or paper and markers. Add a second craft only if you have the time, supplies, space and help to run it without rushing the first.
Do I need more than one craft?
Quick answer: No. One main project and a quiet option such as drawing or stickers can be enough.
Keep paper and markers out for children who finish early, or let them play with what they made if the project is something like a character or puppet. Add another craft only if you have the supplies, space and adult help to run it alongside the first.
Skip extra stations you can't help with, and skip decorations that take up space you need for projects. If the finished craft already gives every guest something to take home, you may not need a separate favor bag.
What craft can guests finish during one party?
Quick answer: For teens, a bracelet, decorated frame or tote bag may fit, depending on the materials and finishing steps. Test a sample to find out.
Choose something guests can put down to eat without losing their place. If part of the work has to be finished at home, tell families and explain what is left to do.
If you are thinking about clothing, guests don't need to know how to sew. Fabric paint, suitable markers or pins can work if they suit your supplies and guests. Patches may need sewing, heat or another way to attach them, so check the specific product before you choose patches. If a patch needs a finishing step you can't do at the party, pick another way to attach it or another project.
For teens, a thrift flip party is one optional clothing project that uses fabric paint, suitable markers or pins. Guests don't need to sew. If you add patches, check how each specific product attaches and whether you can finish that step at the party.
What to prepare before the party
Most of the work happens before guests arrive. Make the sample and prepare any pieces that need adult help. Count the supplies, and label the projects and take-home bags. Set aside a drying area. Before party day, confirm food needs, helper jobs and who is collecting each child.
Keeping these details in one place makes the last check easier. The party guest-list planner lets you record each guest's food notes, a contact and the agreed pickup plan, along with the finish time and who is collecting each child.
Count seats and usable workspaces before you confirm the guest list. When you count, decide whether you're including the birthday child, any siblings joining in and any adults who want to make something. Add only the people you haven't already counted. If younger siblings will join, set up a separate project for them with an adult to help, instead of asking older guests to look after them while they craft.
Should guests bring their own base item, such as clothing?
Quick answer: Either way can work. Tell guests exactly what to bring, or provide the same base item for everyone.
Keep a spare available so a guest can still join in if they forget their item or it doesn't work with the materials. Don't use a favorite jacket to try out an unfamiliar product.
Set up the craft table
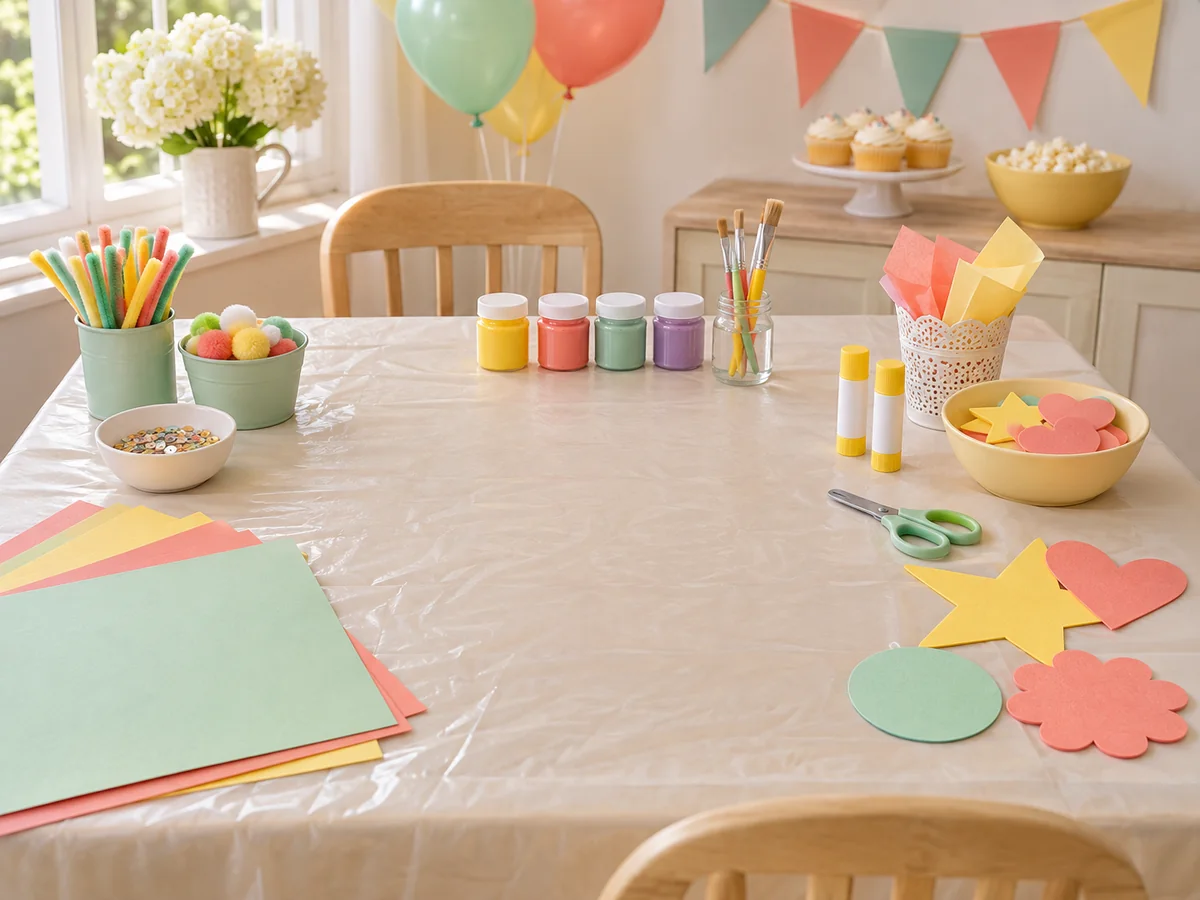
Give each guest a base item and a workspace with their name on it. Put common colors, beads or decorations in small groups within reach. Have extra copies of any tool everyone needs at the same step, so the whole table isn't waiting for one pair of scissors or one bottle of glue.
Keep your sample where everyone can see it, with scrap material beside it for testing a color or practicing a step. Present the sample as one example, not the only right design. Show the group how to start and how to finish, then stay available for questions.
Cover the table and keep wipes and trash bags close by. Keep unfinished work away from scraps so nobody throws it out during cleanup.
| Area | What to have ready | Why it helps |
|---|---|---|
| Each place | Base item and name label | Guests know which space and project are theirs |
| Shared supplies | Small groups of colors and decorations within reach | Less passing and reaching across the table |
| Tools | Extra copies of the tool everyone needs at once | Nobody waits for one pair of scissors |
| Sample spot | Finished sample and scrap material | Guests can see the steps and test ideas |
| Drying area | Labeled trays or open boxes on a reserved surface | Wet work stays safe and easy to find |
| Quiet option | Paper, markers or stickers away from the craft supplies | Early finishers have something easy to start |
How much adult help does a craft station need?
Plan adult help for any tools or finishing steps the project needs, and get the pieces that need adult help ready before the party. While guests are working, stay nearby for supplies, fastening, food, questions and rides. Tell guests where to find you.
With teens, give them room to talk and make their own design choices instead of hovering over every conversation. Step in when safety, noise, house rules or how guests are treating each other needs attention. If someone needs help with a fastening or wants a quieter place to sit, offer it quietly instead of making an announcement to the whole group. Agree on adult arrangements with families before the party.
What house rules should be clear?
Quick answer: Before guests arrive, agree which rooms and outdoor areas are open, where food and drinks go, how loud the music can be, what's expected around phones and photos, how cleanup works and when the party ends.
Keep the explanation short and specific when you welcome everyone. Confirm rides with the people collecting each guest before party day.
Give guests choices and plan for different skill levels
Children enjoy a craft station more when they can decide what to make. Show how the materials work, keep examples out, and don't ask everyone to copy the same design. For teens, avoid requiring matching results or asking everyone to show their work to the group.
How do I include children with different skill levels?
Quick answer: Choose a project with a simple part guests can do themselves, and prepare the harder steps in advance when needed.
Offer an optional extra detail for children who want a challenge, but don't make it necessary for finishing. With the same materials, one guest might add a few stickers to a frame while a friend paints a detailed border.
How do I make a teen craft party feel age-appropriate?
Quick answer: Let your teen help choose the project, designs, music and food. Give guests room to make different things, and explain simple boundaries at the start.
At a bracelet party, let your teen pick the colors and bracelet styles. Show guests how the materials work, then let them decide what to make. Exchanging bracelets should be optional, and nobody needs to make a second one.
At a vision board party, give each guest their own materials and let them decide what goes on their board. Sharing should be optional; don't ask anyone to present personal goals.
Does everyone need to make a board about future goals?
Quick answer: No. Guests can make a collage about hobbies, favorite colors, places they'd like to visit or things they enjoy now.
They can use drawings and handwritten words instead of magazine pictures. The same idea works for any project: let guests take the theme in their own direction.
Plan for early finishers, breaks and guests who don't want to craft
Some guests will finish before others, and some won't want to make the main project at all. Every gap doesn't need a game. Keep a simple paper activity available, and let guests sit and talk with friends.
What can guests do if they finish early?
Quick answer: They can decorate a take-home label, sketch another design, add a few details or talk with friends.
Guests don't need to add more to a project just to fill the time. If you offer a short seated game or quiz, wait until tools and wet projects are put away so everyone who wants to join can take part. Leave room in the schedule for cleanup and gathering projects before pickup.
What if someone doesn't want to make the main project, such as a bracelet or customized clothing?
Quick answer: Let them take a break, chat, sketch or choose colors for another project. Have a simple card game or an optional photo area available.
If it suits your materials, a guest could decorate a supplied tote instead of a piece of clothing. Nobody needs to model their item, enter a design contest, make a second bracelet or exchange one.
What can guests do while a project is drying or the table is cleared?
Quick answer: Have a quiet, easy-to-start activity ready away from the craft supplies, such as drawing or a group prompt.
A short transition game works too, but start it in a different spot from where projects are drying or the table is being cleared.
Plan food around the craft
Set up a separate place for food. Decide whether you'll serve food before the craft or pause partway through to clear the table. Have guests put their tools down and wash their hands before eating, and keep plates away from the work surface.
Decide whether the invitation includes a meal or just snacks and cake, and don't assume guests have already eaten. Pizza, tacos, sliders or pasta can make a meal. Between meals, fruit, salty snacks, cookies or cupcakes and water are options. Check food needs before you shop, change the menu to suit the group, and count any adults or siblings who will eat too. Keep refills somewhere else instead of putting the whole supply out beside the paint and glue.
What if I only have one table?
Quick answer: Plan a break to move projects to their labeled spots, put away the craft supplies and clear or change the table cover before serving food.
It helps to plan where finished projects will go before you start, so the switch to food goes quickly. A separate surface for labeled projects keeps them away from plates and drinks. For layout ideas, see this kids party table setup.
Set up the quiet activity in another spot while the table is being cleared, so guests aren't waiting around the table.
Handle drying, packing and taking projects home
Give finished work its own spot and keep it with the child's name or belongings. Before the party, check the project instructions for any drying or packing steps so you know how much time to leave.
Not every project will be ready to wear or use at pickup. That depends on the materials and finishing steps, so check the drying, setting and care instructions in advance, and don't promise that guests can use their projects right away.
How do guests take home projects that are still wet?
Quick answer: Prepare labeled trays or open boxes, and reserve a surface for drying.
Follow the material instructions before stacking, sealing or handling the work. Don't put wet work in a sealed bag just because it's easier to carry. Tell families if a project needs to stay flat on the ride home or needs another finishing step before use, and share the instructions for what's left to do.
Example: a two-hour craft party schedule
This example is for illustration only. Imagine eight children, including the birthday child, making one tested project, with a snack break and cake. The adults helping aren't included in the eight. Change the times to suit your sample and guests. Projects may still be drying after the party ends. The final packing period doesn't mean every material will be ready to seal or use.
If your sample needs more hands-on time, change the invitation times or choose a simpler project. Don't expect guests to work faster just because the schedule has moved on.
| Time | Minutes | What happens |
|---|---|---|
| 0:00–0:15 | 15 | Welcome guests, show them where to put bags, and let them look at samples or sketch designs |
| 0:15–0:25 | 10 | Show how to do the project, including the start and finish, shared tools and the drying area |
| 0:25–1:05 | 40 | Work on the craft; an adult helps with fastenings and moves finished pieces to named trays |
| 1:05–1:25 | 20 | Put tools away, wash hands and eat a snack, such as fruit and cookies, away from the work surface |
| 1:25–1:40 | 15 | Finish suitable details, decorate labels or sit with friends; don't add wet layers you didn't test |
| 1:40–1:50 | 10 | Serve cake while projects stay in the drying area |
| 1:50–2:00 | 10 | Pack projects, explain any remaining drying steps and help guests carry their work |
Craft station checklist
- Choose one main project and a quiet option such as drawing or stickers
- Make a full sample, including fastening, drying and packing
- Count seats, base items and take-home trays, and note who's included in your count
- Tell guests what to bring, or provide base items and a spare
- Prepare the pieces that need adult help, and arrange helpers
- Have extra copies of the tools everyone needs at the same step
- Set up separate food and drying surfaces, and plan a table change if you only have one table
- Confirm food needs, house rules and who's collecting each guest
- Leave the final part of the party for cleanup, packing and pickup